เพิ่มบทความใหม่


jQuery คำสั่งที่ใช่บ่อย ช่วยให้ทำงานเร็วขึ้น โดยก็อปโค๊ดด้านล่างไปใช้ได้เลย
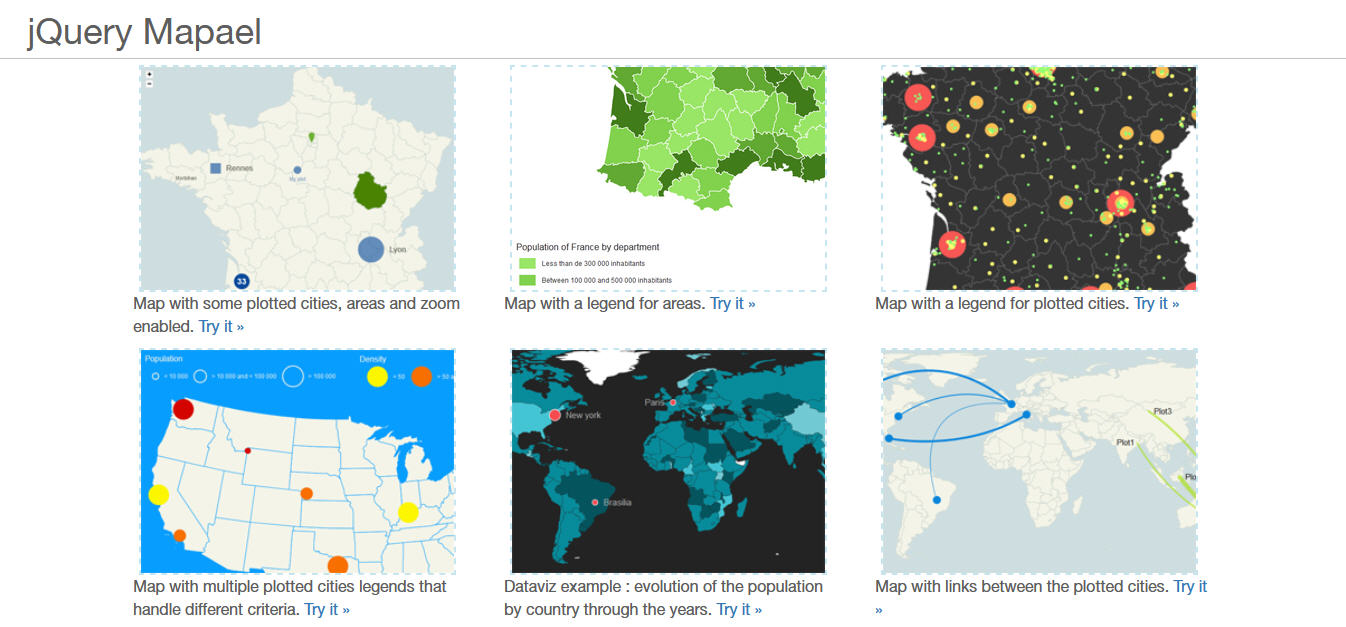
jQuery Framwork ช่วยทำแผนที่ SVG
คุณสามารถทำไฟล์ SVG มาปรับให้เป็นแผนที่แบบแบ่งโซนได้เช่นแสดงเขตต่าง ๆ ในกรุงเทพมหานคร
Simple Ajax Uploader
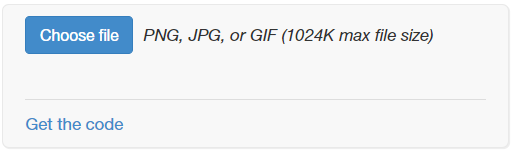
Download on Github:
https://github.com/LPology/Simple-Ajax-Uploader
Javascript API Reference:
https://www.lpology.com/code/ajaxuploader/docs.php
แปลงข้อความเป็นตัวเลข
ดาวโหลดฟรี: https://github.com/adamwdraper/Numeral-js
numeral($("#id").val()).value();

หรือใช้ฟังค์ชั่น
function getNumberal(number = "") {
  return numeral(number).value();
}
ฟอร์แมตตัวเลขให้มีคอมม่าขั้น
function numberFormat( price="", num=2 ){
	let val_price = parseFloat(price);
	if( isNaN(val_price) || val_price==0 )return false;

return $.number( val_price, num );
}
ย่อตัวเลขราคา หลักแสน หลักล้าน ให้สั้นลง เช่น 1,200,000 เป็น 1.2 ลบ.
วิธีใช้:
numeral(val).format('(0.0 a)');

ใช้ร่วมกับ Handlebarjs:

    Handlebars.registerHelper('formatePrice', function (val) {
        return numeral(val).format('(0.0 a)');
    });

// ตั้งค่าให้รองรับภาษาไทย
numeral.register('locale', 'th', {
    delimiters: {
        thousands: ' ',
        decimal: ','
    },
    abbreviations: {
        thousand: 'แสน',
        million: 'ลบ.',
        billion: 'พ.ลบ.',
        trillion: 'ล.ลบ.'
    },
    ordinal: function (number) {
        let chr = "";
        if (number === 1) {
            chr = 'st';
        } else if (number === 2) {
            chr = 'nd';
        } else if (number === 3) {
            chr = 'rd';
        } else {
            chr = 'th';
        }
        return chr;
    },
    currency: {
        symbol: '฿'
    }
});

// switch between locales
numeral.locale('th');
ให้ jQuery UI แสดงภาษาไทย และรองรับปี พ.ศ.
1. เพิ่ม Script Src
http://ajax.googleapis.com/ajax/libs/jqueryui/1.11.1/i18n/datepicker-th.js2. เพิ่มคำสั่ง
$("#Datepicker1").datepicker(
  $.extend($.datepicker.regional["th"], {
    dateFormat: "yy-mm-dd",
  })
);
jQuery รองรับปี พ.ศ.
var currentDate = new Date();
currentDate.setYear(currentDate.getFullYear() + 543);
$('#date-of-birth').datepicker("setDate",currentDate );
การใส่ค่าให้ Radio โดยดูจาก Value
$('input[name=RadioPropExtend][value=2]')
    .prop("checked", true);

รับข้อมูลจากตัวเลือก Radio ด้วย jQuery
// Radio ไม่อยู่ในแบบฟอร์ม
$('input[name=radioName]:checked').val()

// Radio ในแบบฟอร์ม
$('input[name=radioName]:checked', '#myForm').val()

https://stackoverflow.com/questions/596351/how-can-i-know-which-radio-button-is-selected-via-jquery
ฟอร์แมตเบอร์โทรให้ดูสวยงามใช้ส่วนขยาย jQuery
$(document).ready(function () {
  $(".Input-Mobile").usPhoneFormat({
    format: "(xxx) xxx-xxxx",
  });

  $(".Input-Mobile").usPhoneFormat(); //OUTPUT: xxx-xxx-xxxx
});
ดาวโหลดบน Github: https://github.com/rajaramtt/jquery-input-mask-phone-number
ผลลัพท์การฟอร์แมตเบอร์โทร
การแสดงข้อความแจ้งหน้าเว็บให้ดูสวยงามด้วย Aweetalert2
ดาวน์โหลดได้ที่: https://sweetalert2.github.io
//แสดงข้อความแจ้ง Error
function showError( msg="" ) {
let val_msg = (msg)?msg:"ไม่สามารถบันทึกได้";
swal({
	title: val_msg,
//    text: "You will not be able to recover this imaginary file!",
  type: "error",
  icon: 'error',
	timer: 3000
	}).then((result) => {
		console.log("Error");
	});
}//func

//แสดงข้อความแจ้งเตือน
function showAlert( msg="" ) {
let val_msg = (msg)?msg:"โปรดอัพโหลดรูปภาพก่อนบันทึก";
swal({
	title: val_msg,
//    text: "You will not be able to recover this imaginary file!",
  type: "warning",
  icon: 'warning',
	timer: 3000
	}).then((result) => {
		console.log("Warning");
	});
}//func

//แสดงข้อความแจ้งทำงานสำเร็จ
function showSuccess( msg="" ) {
let val_msg = (msg)?msg:"บันทึกเสร็จแล้ว";
swal({
	title: val_msg,
//    text: "You will not be able to recover this imaginary file!",
  type: "success",
  icon: 'success',
	timer: 2000
	}).then((result) => {
		console.log("Success");
		location.reload();
	});
}//func

//แจ้งแบบบาร์โชว์มุมจอขวามือ: https://sweetalert2.github.io/#mixin
function notification() {
	const Toast = Swal.mixin({
		toast: true,
		position: 'top-end',
		showConfirmButton: false,
		timer: 3000,
		timerProgressBar: true,
		didOpen: (toast) => {
			toast.addEventListener('mouseenter', Swal.stopTimer)
			toast.addEventListener('mouseleave', Swal.resumeTimer)
		}
	});

	Toast.fire({
		icon: 'success',
		title: 'Signed in successfully'
	});
	}//func
ให้กรอกได้เฉพาะตัวเลขจำนวนเต็ม หรือตัวเลขทศนิยม ด้วย jquery number extenson
//กรอกได้เฉพาะตัวเลขจำนวนเต็ม
$('.number-only').number(true, 0); //output: 1,000
//กรอกได้เฉพาะตัวเลขทศนิยม 2 ตำแหน่ง
$('.decimal-only').number(true, 2); //output: 1,000.23
ดาวโหลดที่ลิงค์นี้: https://github.com/customd/jquery-number
ใส่รูปภาพพื้นหลังด้วย jQuery
let val_FileName = "pathImage";
$('#id').css('background-image', 'url(' + val_FileName + ')');
ดึงรูปภาพพื้นหลังจาก Style เช่น div style=background-image ด้วย jQuery
   $("div").click(function() {
        var bg = $(this).css('background-image');
        bg = bg.replace('url(','').replace(')','').replace(/\"/gi, "");
        alert(bg);
    });
ที่มา: https://stackoverflow.com/questions/8809876/can-i-get-divs-background-image-url
Full Calendar v5
ดูตัวอย่าง: https://fullcalendar.io/demos
แพ็คเกจ:
https://www.jsdelivr.com/package/npm/fullcalendar
https://cdn.jsdelivr.net/npm/@fullcalendar/core@5.5.1/

Full Calendar v3 และ v5 โหลดข้อมูลจากหลายแหล่ง เช่น JSON และ AJAX
$('#calendar').fullCalendar({
eventSources: [
    // your JSON event source
    {
        url: '/myfeed.php', // use the `url` property
        color: 'yellow', // an option!
        textColor: 'black' // an option!
    },
    // your ajax event source
    {
        events: function (start, end, callback) {
            $.ajax({
                    url: 'myxmlfeed.php',
                    dataType: 'xml',
                    data: {
                        // our hypothetical feed requires UNIX timestamps
                        start: Math.round(start.getTime() / 1000),
                        end: Math.round(end.getTime() / 1000)
                    },
                    success: function (doc) {
                        var events = [];
                        $(doc).find('event').each(function () {
                                events.push({
                                    title: $(this).attr('title'),
                                    start: $(this).attr('start') // will be parsed
                                });
                            }
                        });
                }
            }
        ]
    });
แสดง Popover คำแนะนำเล็ก ๆ ไว้ตลอดเวลา
$("#AnchorContact").popover({
  placement: "left",
  trigger: "show",
  html: true,
  content: "[ใส่ข้อความที่นี่]",
});

$("#AnchorContact").popover("show");
แสดง Popover คำแนะนำเล็ก ๆ เมื่อเม้าท์เลื่อนผ่าน
$("#toTop").popover({
  "max-width": "600px",
  html: true,
  content: function () {
    return $("#Controlhtml").html();
  },
  title: function () {
    return "";
  },
});
jQuery Slick Corousel ทำสไลด์รูปภาพที่ใช้บ่อยสุด และดีสุด
Slick เป็นฟังค์ชั่นทำสไลด์รูปภาพที่ถูกพัฒนาต่อจาก Corousel จึงเป็นที่นิยมสำหรับหมู่คนเขียนเว็บ
ดาวโหลดได้ที่: https://kenwheeler.github.io/slick/
ปรับแต่งลูกศร: https://gist.github.com/ricardosilval/a0b7e4e21b96cf695765

การเปิดใช้ Slick
        function SlickUnActivate(ClassName = "") {
            $(ClassName).slick('unslick');
        }

        function SlickActivate(ClassName = "") {
            let $parentSlider = $(ClassName);
            (function ($) {

                $parentSlider.slick({
                    arrows: true,
                    dots: true,
                    infinite: true,
                    speed: 300,
                    slidesToShow: 1,
                    //centerMode: true,
                    centerPadding: '0px',
                    autoplay: true,
                    autoplaySpeed: 4000,
                    variableWidth: true,
                    focusOnSelect: true,
                    prevArrow:
                        '<button class="slick-prev slick-arrow"></button>',
                    nextArrow:
                        '<button class="slick-next slick-arrow"></button>',
                    responsive: [{
                        breakpoint: 600,
                        settings: {
                            slidesToShow: 2,
                            slidesToScroll: 1
                        }
                    },
                    {
                        breakpoint: 480,
                        settings: {
                            slidesToShow: 1,
                            slidesToScroll: 1
                        }
                    }
                    ]
                });

            })(jQuery);
        }
jQuery Owl Corousel ทำสไลด์รูปภาพที่ใช้บ่อย
ดาวน์โหลดเวอร์ชั่นล่าสุดฟรี
https://owlcarousel2.github.io/OwlCarousel2/demos/mousewheel.html
วิธีใช้:
$(document).ready(function () {
  var owl = $(".owl-carousel");
  owl.owlCarousel({
    stagePadding: 230,
    margin: 5,
    autoplay: true,
    autoplayTimeout: 5000,
    autoplayHoverPause: true,
    dots: false,
    nav: true,
    navText: ["", ""],
    loop: true,
    responsive: {
      0: {
        items: 1,
      },
      600: {
        items: 3,
      },
      1000: {
        items: 1,
      },
    },
  });
});

ดึงข้อมูลจาก Input Box ที่อยู่ใน Form : มีประโยชน์ตอนทำ URL Query ง่ายและรวดเร็ว
//ดึงข้อมูลทุกอันจาก Form Inputs
var queryString = $("form#InputForm").serialize();
//นำมาประกอบกับไฟล์สร้าง Query String
var urlString = `email_v2.php?${querySTring}`;
//ส่งข้อมูลผ่าน URL ด้วย Ajax ฟังค์ชั่น GET ของ jQuery
$.get( urlString, function(data, status){
}
เลื่อน Scroll ไปยังตำแหน่ง ID ที่ต้องการ โดยกำหนดให้ห่างจากด้านบน 400px (ทดสอบแล้ว 100%)
กระโดดไป Content
function scrollToAnchor(pinID) {
  $("html,body .body-content").animate(
    { scrollTop: $("#" + pinID).offset().top },
    1000
  );
}

$(".scroll-content").scrollTop(400);

function scrollToAnchor(pinID) {
  $("html, body").animate({ scrollTop: $("#" + pinID).offset().top }, 1000);
}
หาตำแหน่งจากผู้ใช้เลื่อ Scroll แท็ก Div
$(document).ready(function () {
  let $inputElem = $("#myScroll");
  $($inputElem).scroll(function (event) {
    var scroll = $($inputElem).scrollTop();
    // example: 17
    console.log(scroll);
  });
});
ตรวจจับผู้ใช้คลิกถูกเมนูที่ต้องการหรือไม่ เช่นใช้ซ่อนเมนู หากผู้ใช้คลิกส่วนอื่น ๆ บนหน้าเว็บ
$(document).on("click", function (event) {
  // console.log(event.target);
  if (!$(event.target).closest(".suggestion").length) {
    if (!$(".suggestion-container").hasClass("d-none")) {
      $(".suggestion-container").addClass("d-none");
    }
  }
});
Select Input แบบ Array เช่น name="id[]"
วิธีเลือก
$('input[name^="pages_title[]"]').each(function(){
    alert($(this).val());
});
Input Box ตรวจจับการกด Enter จากผู้ใช้ เช่นช่องค้นหาหลังจากผู้ใช้พิมพ์ข้อมูลแล้วมักจะกด Enter
$('#keyword').bind("enterKey", function (e) {
    eventSearch();
    });
$('#keyword').keyup(function (e) {
    if (e.keyCode == 13) {
    $(this).trigger("enterKey");
    }
});
คำสั่งจับ Pixel ขณะเลื่อน Scroll Bar
$(window).scroll(function () {
  var scroll = $(window).scrollTop();
  //console.log(scroll);
  //>=, not <=
  if (scroll >= 150) {
    $(".bg-nav-tooktee").addClass("bg-nav-menuopen");
  } else {
    $(".bg-nav-tooktee").removeClass("bg-nav-menuopen");
  }
});
คำสั่ง Each แสดงค่าของ Array
// ARRAYS
const arr = ["one", "two", "three", "four", "five"];

$.each(arr, function (index, value) {
  console.log(value);
  // Will stop running after "three"
  return value !== "three";
});
// Outputs: one two three
คำสั่ง Each แสดงค่าของ Object
// OBJECTS
const obj = {
  one: 1,
  two: 2,
  three: 3,
  four: 4,
  five: 5,
};

$.each(obj, function (key, value) {
  console.log(value);
});
// Outputs: 1 2 3 4 5
คำสั่ง POST
$.post("[URL.asp]", function(data, status){
alert("Data: " + data + "\nStatus: " + status);
});
คำสั่ง GET
$.get("[URL.asp]", function(data, status){
alert("Data: " + data + "\nStatus: " + status);
});
Ready ให้ทำงานเมื่อโหลดหน้าเว็บเสร็จ
$(document).ready(function(){
//do});
Body คลิกตรง ID ที่ระบุ เช่นตั้งชื่อ ID ให้กับ Select ให้ทำงานเมื่อผู้ใช้เลือกรายการ
$('body')
.off("change", "[#id]")
.on("change", "[#id]", function (){
//do
})
;
ตรวจข้อมูลใน From เช่น อีเมล์
function checkEmailExisted(email) {
let email = email || "";
if(email == "")return false
var objElem = {
agentEmail : "อีเมล์"
}
var x;
for (x in objElem) {
if($("#"+x).val() == "") {
alert("กรุณากรอก: "+ objElem[x]);
$("#"+x).focus();
return false;
}
}
var emailFilter = /^.+@.+\..{2,3}$/;
let inputEmail = $("#agentEmail");
if (!(emailFilter.test(inputEmail.val()))) {
alert ("กรุณากรอก E-mail");
inputEmail.focus();
return false;
}
var objInput = {
email : $("#agentEmail").val() || ""
}
$.get("[filename.php]", objInput, function(data, status){
if(data.Data.isAgent != 0) {
}
});
}//func